COM271—Task 3
Simple resume
Given 9/10 | Due 9/10
Syllabus | Assignments | References and Useful Links
←Task 2 | Task 4→
Overview: Refine your knowledge of html, tables and table attributes by creating a simple online resume.
Preparation: Readings from weeks 1 & 2 (html elements and attributes, tables, links, elements used in <head>). Study the html elements and html attributes pages thoroughly.
Making Your HTML Resume Page
Open 2_html_bio.htm (you made this page in task 2) in the Dreamweaver working window. From the Dreamweaver File menu, save as "3_html_resume.htm"
Note again that you are now working on 3_html_resume.htm in the Dreamweaver work window. Follow these steps, checking off each as you go:
- Update the banner text with "(your name)'s Resume". Also, update the <title> element in the header with the same text.
- Replace the text in the content cell with a table, as follows: Highlight the text in the work window (double click to select single words or click and drag to select longer passages), then use the Dreamweaver Insert (menu) > table and set up a 700-800 pixel-wide table with two columns and at least 4 rows. If you need to read more about tables and nesting, read here.
- Write a resume: Fill in the table cells with resume information. If you need help, consult "Notes on Writing a Resume."
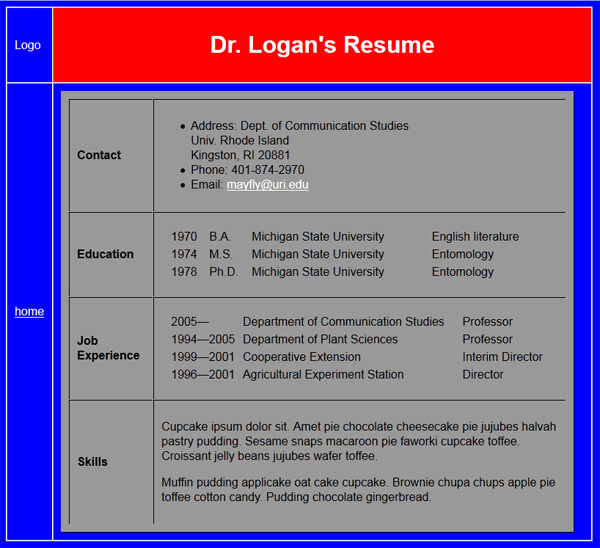
- In the first column of table cells, include major headings (e.g., Contact | Education | Job Experience | Skills) (try <h4> tags for emphasis).
- In the second column, provide brief real-world information (<p> tags).
Notes:
- In the illustration above, note that the cell containing contact information contains an unordered list (<ul>) and list items (<li>). Learn more about these on the html elements page.
- The education and job experience cells contain 4- and 3-column tables (yes, these tables are nested 3-deep!). Attempt this for yourself. If you need help, click on the image to be taken to the actual html page that I used to produce the image; use the browser's tools>web developer>page source menu (firefox) to see the html that I used. Don't copy and paste without understanding exactly how this works (hint: when you do understand, use dreamweaver to set up each table within the resume table).
- The skills cell contains "dummy" or "Greeked" text, used as a filler until I get around to composing the actual text for this cell. To learn how to do this, skip ahead to week 5 and look at Generating Filler Text. Here, I used the online text generator for sweet-tooths: Cupcake Ipsum.
Update your home page (index.htm)
If it is not already open, open your file index.html by double clicking on its icon in the Local Files list of the site window, and do this:
- Add a link ("HTML Resume") after your link to your Bio page. In Dreamweaver's Property window, click on the file-folder icon to the right of the link text box, and navigate to the file html_resume.htm. When you have done this, you should see a link, as above.
- If your links appear on the same line, insert a line break ( <br /> ) between them or put each link inside of a paragraph tag (e.g., <p><a href="html_resume.htm">HTML Resume</a>)
You now have a site with three pages. The home page (index.html) has a link to the rest of the pages on the site (only two at the moment). The site pages (this one and the bio page) each have a link to the home page. Time to call it a day?