COM271—Task 2
HTML basics for a simple bio page
Given 9/8 | Due 9/8
Syllabus | Assignments | References and Useful Links
←Task 1 | Task 3→
Overview: Make your second web page, adding an image and text to the content area. Link to and from this page, connecting to your home page (index.htm). Copy and paste a simple CSS style sheet for this page. You will complete this assignment during one lab session.
Preparation: Readings from weeks 1 & 2 (html elements and attributes, tables, links, elements used in <head>).
Making your HTML Bio page
Open index.htm (task 1) in the Dreamweaver working window. From the Dreamweaver File menu, save as "2_html_bio.htm". (Suggestions for choosing file names.)
Suggestions for choosing file names
Never include blanks in the file name: Use underscores (_) to separate words in a name. Use lower case. Keep the names short (say, under 20 characters, and under 10 is better so long as the name serves to remind you of what is in the file. Use file extensions consistently: htm and html are both hypertext file extensions, but if you use only one of these consistently in naming your files, you will be able to recall them later. In naming my task files, I include both a task number and a descriptive label (e.g., this page is named "2_html_bio.htm").
The new file is now listed (Files>Local Files) in the site window; the working window will now have a tab showing "2_html_bio.htm" (or the name you used). You may re-open index.htm by double-clicking the file icon in Local Files.
Continue with these steps, checking off each as you go:
- Replace the banner text with "(your name)'s Bio" (contained in an <h1> tag, of course). Also, update the <title> element in the header with the same text.
- Replace the text in the content cell with a table, as follows: Highlight the text in the work window (double click to select single words or click and drag to select longer passages), then use the Dreamweaver Insert (menu) > table and set up a table with two columns and only one row. You are nesting one table inside a cell of a containing table. If you need to read more about tables and nesting, read here.
- Add a new folder for images under your root folder: In the Dreamweaver Local Files list, right-click on the Site root folder (the first folder icon at the top of the list) and then click "New folder." An unlabeled "new folder" icon will appear at the end of the Local files list. Type "images" as the name of the folder.
- Save an image in the images folder: Outside of Dreamweaver, retrieve an image for use on this page. You may get one from your facebook page, or by using google to search for an image of your choice (e.g., open google, select images as your search option, and enter "pretty flower" or "handsome dude" or some such thing to search for an appropriate (professional, socially acceptable) image. If you want to change the size of the image or to crop it, see notes on "Cropping and Sizing Images" for a tutorial on use of photoshop for this (ask your instructor for help: this will also be briefly demonstrated in lab). Save this image, navigating to your site>image folder and saving it as "bio.jpg"
- Insert the image (previous step) in the left cell of the contents table: Click Insert (menu) > Image and navigate to the image folder and hit "ok".
- Compose 1 or 2 paragraphs of professional biographical material (describe yourself as a student within a major; give a little background (born where? went to school where? interests?); briefly state post-graduation objections, etc.). Enter these in the right cell of the contents table.
- Add a simple CSS style sheet to your page. For now, just highlight and copy the following code. Paste it on the code-view of your page, immediately before the closing </head> tag:
<style media="screen" type="text/css" >
body {background-color:blue;color:white;font:16px arial, sans-serif;}
table table{background-color:#999;color:#000;padding:10px;text-align:left;}
a{color:white;}
</style>
This code will give your page a blue background, set the type size and family and color, and give the nested table a little different look, too. - Tweak the html attributes: Study the notes on "HTML Tables, Table Elements, and Major Attributes." Experiment using the html "bgcolor" attribute to turn the area behind the banner red and the area behind the navigation cell blue. Experiment with alignment, padding, etc. as you wish. This might be a good time to become familiar with Dreamweaver's tag inspector and with the properties panel: Dr. Logan will demonstrate these in lab.
- Replace the word "navigation" (left side, lower cell) with the word "home." Double click on "home" to highlight it, then in the Dreamweaver properties window (click refresh if need be), find the box labeled Link and type "index.html". Then click once back in the work window. You should now see, in the navigation cell,
<a href="index.html">home</a>
Update your home page (index.htm)
If it is not already open, open your file index.htm by double clicking on its icon in the Local Files list of the site window, and do this:
- Replace "navigation" with "HTML Bio". Double click on this new text to highlight it.
- In Dreamweaver's Property window, click on the file-folder icon to the right of the link text box, and navigate to the file html_bio.html. When you have done this, you should see a link, as above. This is another way that Dreamweaver expedites writing code to link files.
- Be sure that you work has been saved to the server (preview in Firefox or IE) and call it a day.
You now have a site with two pages. The home page, index.htm, has a link to the rest of the pages on the site (only one at the moment). The site page (the bio page) has a link to the home page. A good start!
How Will This Assignment be Graded?
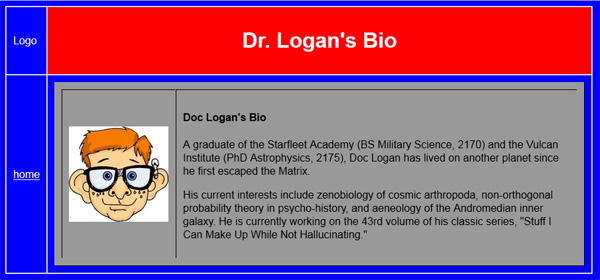
This assignment is worth 5% of your final grade. Your instructor will be looking for proper tables, an image folder and image on the page, a bio written in paragraph tags (something resembling the image above, although less goofy).